Friday, February 24, 2012

Washable Dusting Cloths

Friday is my cleaning day. I really dislike spending a good chunk of my Saturday cleaning, so started doing a bunch on Fridays. I make it a game with the kids: chase with the vacuum, make a train with the kitchen chairs while I sweep and scrub. They even like to help me dust. Today, I went to get out my dusters and realized I had fogotten to add the dusting cloths to my list when we shopped this week. Then I remembered I had seen something on Pinterest about reusable dusting cloths. It was something I pinned early in my Pinterest days, so I didn't check out where the link went before pinning. Unfortunately, it linked to an etsy page. Never fear! I'm a creative and resourceful mama with an abundance of sewing supplies and skills. Here's my tutorial for you. This is really easy to do. Even with taking pictures and getting it ready for the tutorial, it took me 20 minutes. It is designed to use with the Swiffer duster handles.


Make a pattern out of paper or newspaper. You will want to make a rectangle that is 8.5"x4.5". As you can tell by my picture, I chose to make the top rounded. I just used a bowl to make the rounded part. Remember, these are for cleaning, so you don't have to be perfect. I wanted to make mine as crisp as possible to demonstrate for you.


Cut out your pattern using 3 layers of fleece. Fleece won't fray or ravel, so it works great for washing and reusing the duster. The colors don't have to match. You don't even need matching thread.


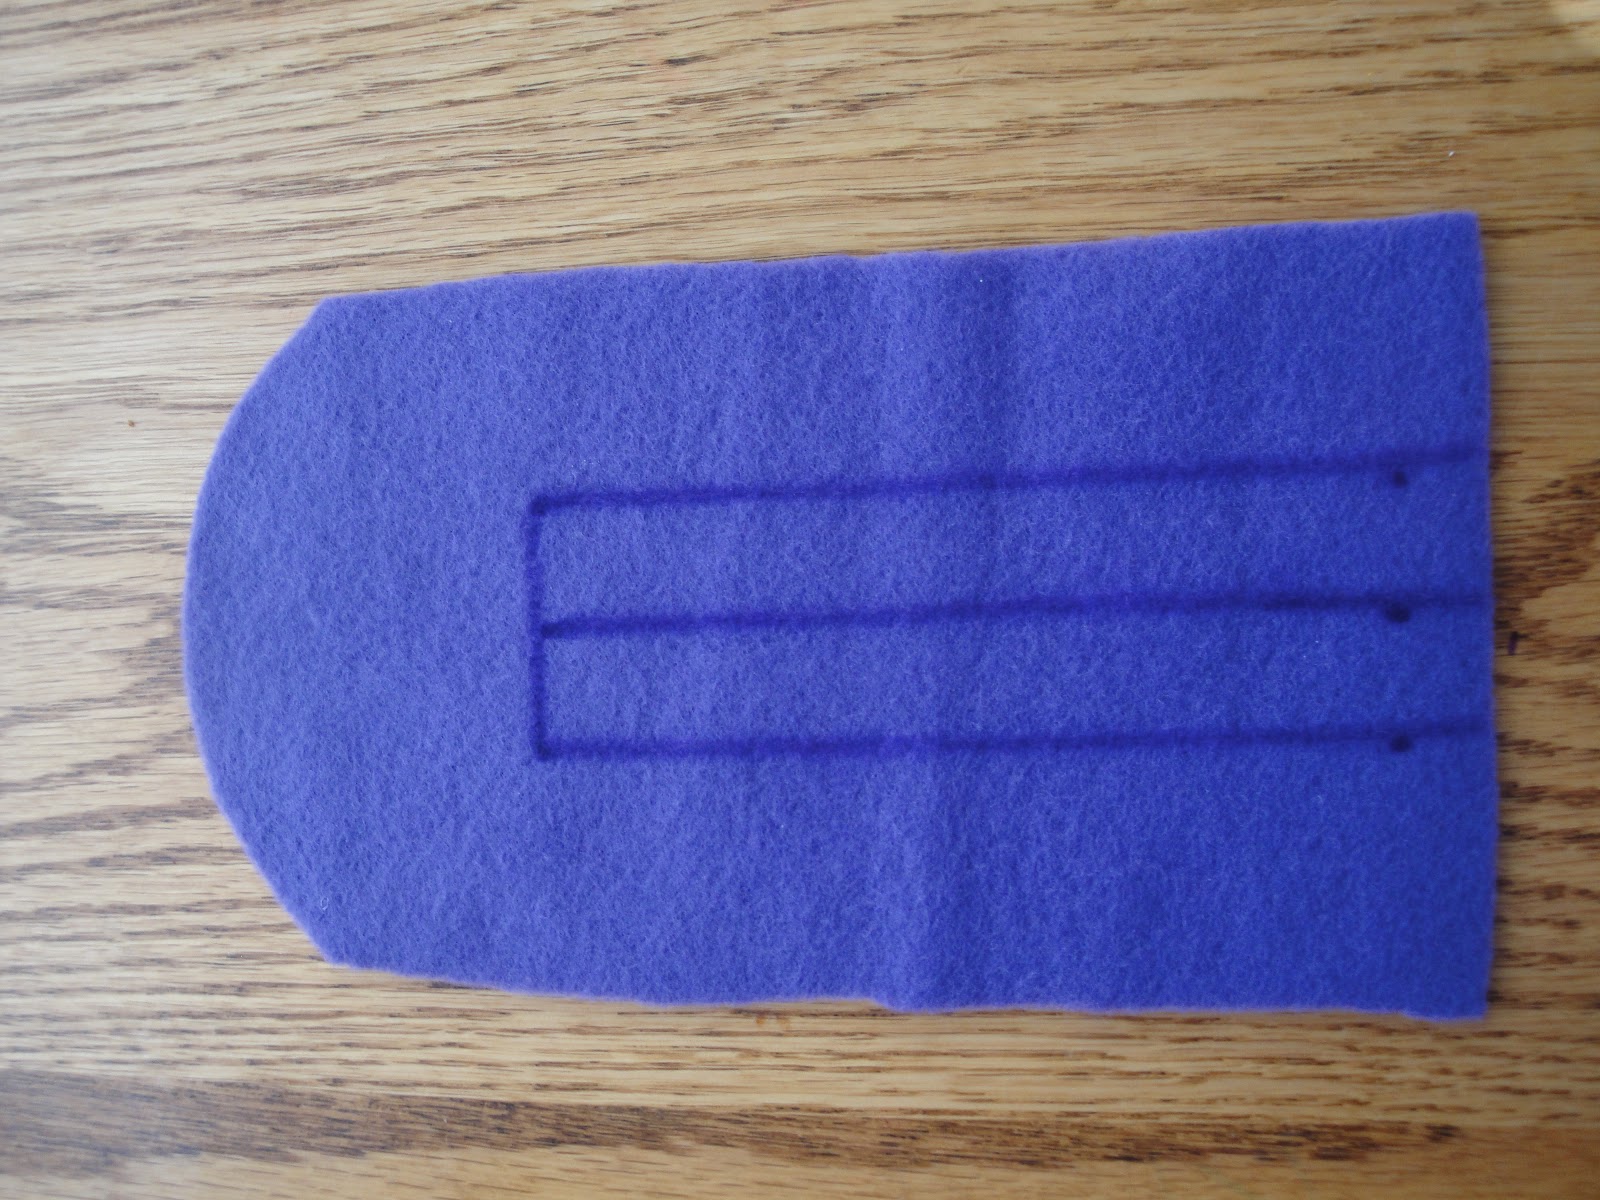
Next mark your sewing lines on one of the pieces of fleece. You will want to draw a line down the center of the fleece at a length of about 5.5" from the bottom edge (non curved edge if you made it rounded). Then make a line .75" on either side of the center line also at a length of 5.5". Draw a line at the top connecting the three long lengths. This creates the pockets for your duster handle.


Stack your three pieces of fleece on top of each other. Sew down the center line through all three layers of fleece. This will hold your duster together. Be sure to reinforce the bottom edge with some back stitches since it will have stress on that seam. Then, fold the bottom layer back and sew down one side pocket line and across the top to the center seam. Only sew through the top two layers of fleece. Repeat for the other side.


With your scissors, cut fringe on your duster. You can cut different fringe for each of the three layers or you can cut through all three at the same time. I cut the 2 top layers (that make the center pockets) together and the bottom layer separately. It's up to you, but I would recommend cutting the third/bottom layer separately since you have a little more fleece you can fringe since there is no pocket on that layer. Ultimately, it doesn't matter.


Test it out! Insert the handle of the duster into the pockets and clean away! When it gets dirty, just pop into the wash, dry and reuse. Simple right??

Tuesday, February 14, 2012

Valentine's Day Fun


Happy Valentine's Day!

I hope you got a chance to read my guest posting on Strive For Progress. My girls and I made a quick and easy Valentine's day craft. One of the things I mentioned in my post is how much more fun holidays are now that I have children. Valentine's Day is no exception. Sure, there's the cards for preschool, cute little valentine mailboxes, candy, chocolate, singing cards (thanks to my dad for those). But even the most simple little things make my girls smile.


For instance, I decorated their door with some cut out hearts. Nothing fancy, but there was one for each of them with their name and a little message from Mom and Dad. This was a HIT! Even my youngest points to the hearts and says "MY valentine, Mommy." Such a simple little surprise.


I had picked up a couple little pieces of clothing when I've seen them on sale. Completely on accident, each of the girls had a piece that was decorated with hearts. What a perfect V-day gift! I just "wrapped" them in some Disney princess lunch bags with their name and some more hearts and set on the table so they would see them right away in the morning. The kids were so excited about their new outfits (and this mama saved a bundle buying heart decorated gear off season!).


And my special treat was making chocolate and vanilla coated strawberries. It's a quick treat to make, but something kind of special. Can't deny the deliciousness of them either!

Tuesdays are a busy day for our family with activities and standing appts. My hubby recognizes that and offered to take us all to dinner tonight too. Nothing fancy but he knows it's tough for me to get dinner ready on Tuesdays. His gift to me is giving me a night off from cooking. What a guy! It really is the little things that make Valentine's Day special for our family. Hope you all have a special day too!

Thursday, February 9, 2012

Nutella Meringue Cookies

Sometimes I really feel like cookies. It's not often, despite my sweet tooth, as cookies aren't usually the sweets I crave. I recently came across a recipe for some Nutella meringue cookies that sounded really tasty. I love meringue cookies because they're so light. The last time I made them, it was nearly a disaster because my oven kept malfunctioning. Truly a 5 hour undertaking. Now, I have my new range and a perfectly functioning oven, so meringue cookies here I come!

Here's what you need:
3 large egg whites at room temperature
pinch of cream of tartar
pinch of salt
1/2 cup plus 1 T granulated sugar
1/4 cup Nutella


Preheat your oven to 300 degrees. Place one rack at the bottom and one in the middle of the oven. Heat your Nutella until smooth and creamy. You can do this in a double boiler or just in the microwave. I put mine in for 30 seconds and it was perfect. Set aside. Use the whisk attachment to your mixer and whip the egg whites on medium speed until frothy. Add the cream of tartar and salt and keep mixing until soft peaks form. Increase the speed to high and add the sugar spoonfuls at a time, making sure it is well incorporated before adding more (this should take several minutes). Once all the sugar is mixed in, continue mixing until stiff peaks form. Then, with a spatula, gently combine the Nutella into the egg white mixture. Do not over mix. You want the Nutella to be marbled in the egg whites and you do not want to lose the fluffy-ness of the meringue.


Place parchment paper on 2 cookie sheets. Drop the meringue batter by spoonfuls on the parchment. This recipe will make 20-28 cookies depending on size. I made rather large cookies and got 20.


Place in the oven and set the timer for 10 minutes. After 10 minutes, rotate the cookie sheets and decrease the heat to 200. Cook for another 45-60 minutes. Your cookies should look not look glossy. Turn off your oven and leave the cookies in the oven as it cools for 1-2 hours. Once cooled you should be able to pick up the cookie with your fingers. Store in an airtight container.


These cookies are the perfect amount of chocolate and light airy deliciousness. They're really simple to make and are something different than a standard drop cookie. Hope you enjoy! ps: if you like the glass bowl my cookies are in, please visit my friend's Etsy store. She does amazing handmade one of a kind glass bowls and dishes. Check out McMahon Studios on Etsy or Facebook. 

Wednesday, February 8, 2012

Fun Update

Hi readers! I know I haven't posted recently. We all get in those busy times, don't we? Right now is one of those times around here. Never fear! There's exciting news on the horizon. This mama is going to be a guest blogger on Strive For Progress. Mae has asked if I would do a monthly posting for a kids' craft project. I did a fun little Valentine's project with my girls earlier this week. You'll see it on Friday on Mae's blog. Please visit http://www.striveforprogress.com/!!