Thursday, December 29, 2011

The little princesses

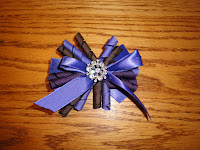
As most of you know, I accepted nominations earlier this month for a little girl to get a special princess tutu and hair bow for the holidays. What started as one princess set ended up becoming three princess sets because there were such wonderful stories I couldn't choose just one. Today I'm going to share these stories with you.

The first little princess is 3-year-old Malia. Earlier this year Malia and her family received the news that her "tummy aches" were caused by a large tumor in her abdomen. It was wrapped around major blood vessels  and pushing against her kidney and heart. It was discovered that she has a very aggressive childhood cancer knows as stage 4 neuroblastoma. It has metastasized into her bones and bone marrow. Her family moved from their home in Florida to Massachusetts to begin treatment on her cancer. She has had six rounds of chemotherapy, two stem cell transplants, radiation, surgery, and blood transfusions. She is a very brave little girl who is an inspiration to those around her. She has shown such bravery and determination this year. It is remarkable what the spirit of a three year old child can do! Here are photos of the first gift.


The second princess is Graycie. She is almost three years old. She has struggled from the day she was born. Her mom had an abrupted placenta and Graycie nearly didn't make it past birth. She has endured feeding tubes, surgery, GERD, hypotonia and more. Her family has been plagued with other medical issues with her siblings, unemployment, and even robbery at gunpoint. Yet, they endure through their faith in God. This is truly a family whose beliefs have made it easier to get through the curve balls life has thrown their way. Graycie has also shown courage and strength well beyond her years. I received a very nice email from Graycie's mom after she received her package. Graycie was so excited about her princess goodies, she could barely hold still long enough for her mom to snap a picture to send to me. Here are photos of miss Graycie wearing her tutu shirt.


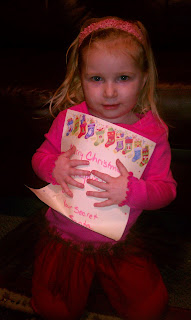
The third princess is KyLee. This is a little girl who from her young age of 5 is well on her way to a career in philanthropy! KyLee started a community service club in her town. She wanted to make new friends and give back to the community at the same time. She developed this idea on her own and through the help of her mom have had several meetings, hosted a guest speaker on service and completed their first service projects. It is amazing to me the compassion this young girl demonstrates. She should be an example to all of us that it doesn't take any heroic measures to become involved. Each of us can donate a little time toward the greater good of the places in which we live. I received a picture of little Kylee in her outfit, too.


These girls are just three examples of the amazing people growing up today. I read many more stories about girls who were also deserving of a princess gift. I wish I could have made something for all of them. Thank you for sharing their stories with me. My small gift pales in comparison to what these kids are giving back to the people around them.

Simply because the holidays are coming to an end, please do not lose that holiday spirit. Continue to do your own random acts of kindness. I know I feel much happier living in a world of kindness and generosity. Challenge yourself to donate time to a local charity or cause for which you believe. Make a resolution to reach out on a monthly or weekly basis and do something nice for those around you. Remember the basic manners you learned as a child and USE THEM. A smile goes a long way toward someone who receives it.

Friday, December 23, 2011

Cake Pops

I'm totally a Christmas baker, but I don't generally make cookies. I prefer to make candy or other sweets. Of course I've made my caramels, plus some nut brittle (a variation of a recipe I learned at cooking class) and some homemade hot chocolate mix. Earlier this week, I saw some instructions on how to make cake pops. You know, those cute little treats on a stick they sell at Starbucks and other coffee shops? The great thing about this process is that you didn't need a cake pop maker. Sure, it's easy, but even for this self-proclaimed kitchen gadget diva, it's just one more thing to fit into the cupboards. Anyone can make these cake pops with just a few ingredients and supplies! I'm going to share with you these instructions with my alterations and some things I learned. Here's what you need:

1 cake mix (in a box, pick your favorite flavor, I used white)
     eggs
     oil
     water
2 8oz packages cream cheese (softened)
1 package meltable candy coating
candy canes (or other hard crushable candy)
peppermint extract
lolly pop sticks

First, bake your cake according to the directions on the box. I can't remember the last time I baked a cake in a plain ol' rectangular pan. Let it cool all the way. Then crumble the entire cake in a large bowl with the softened cream cheese. The original recipe called for one package, but I found it's just not enough to keep the cake balls together, so 2 packages will work best. Besides, who doesn't like more cream cheese?? Mix the cake and cream cheese until well incorporated. Then form the cake/cream cheese mixture into little balls. They should be slightly smaller than golf ball size. Place the cake balls onto a cookie sheet covered with parchment paper. Once all the mix is used (about 24 balls), place the cookie sheet in the refrigerator for at least 15 minutes.


While your cake balls are chilling, get out a big ziploc bag. Put your candy canes (or other candy) in the bag and crush them into small pieces. My daughter had a good time with this step! Caution: do not make candy dust. The flavor will be there, but the texture and visual appeal just won't be the same. We used the flat side of a meat tenderizer, but a rolling pin works too. Put your crushed candy in a bowl and set aside.


Once the balls have chilled, melt your candy coating. Apparently, I am the world's worst candy melter. I ruin the candy more than I actually melt it. I could claim that I'm not used to the cooking temps of my new range, which is true, but mostly I'm a candy melting moron. I thought that melting on the stove would be easier when it came to dipping because I could keep it warm. In two words: EPIC FAIL. I burned the candy in the pan, it clumped and congealed and had to be thrown out. The particular candy I purchased had a special tray and instructions to melt in the microwave. Use them. :) Here is my failed candy.


Anyway, start with just a small amount of the melted candy coating. I found that I needed to make 2 steps of the process where it originally had one. Remove the cookie sheet with your cake balls from the refrigerator. Dip the end of the lollypop stick into the melted candy and stick it into a cake ball. This will help the sticks stay in the finished cake pop. I also purchased the 8" lolly pop sticks that are about 1/8" sticks. The next time I make these, I'm going to get smaller sticks. I think these were just a little too big, but you try what works for you. Put the pops back into the refrigerator for 10 minutes. The original instructions did not include this step and I had quite a few pops that crumbled. They still tasted great, but didn't exactly qualify as a "pop".

Now, melt about half of the candy. Once melted, add about 1 tsp of peppermint extract to the candy. If your choosing to make these at other times of the year and using candy other than candy canes, you can change the flavor or omit all together. For holidays, it does make a pretty tasty pop to flavor the candy peppermint. Then take about 4-5 pops out of the fridge and dip into the melted candy. Use a spoon to coat the entire ball with the candy. Once coated, sprinkle the crushed candy canes on the pop. Place on another cookie sheet covered in parchment to cool and harden.


After I got the candy melted properly and the sticks insterted and cooled, these were pretty easy to make. They look really pretty and taste awesome! And SO much less expensive than buying them :) Happy Holidays!!

Thursday, December 15, 2011

Humbled

I am truly humbled.

My last post asked for nominations for a little girl to receive a special tutu and hairbow set. I didn't want to post again for the folks that were new readers and didn't want to search for the giveaway information. The stories I sent to me were from moms, grandmothers, aunts, and friends. I read stories of girls who are in the midst of medical treatments, overcome a disability, had a challenging year or started a community service organization. Little girls whose sponsor felt strongly why that child should be the winner. In every story, I felt the love these sponsors have toward the girls. Some stories made me cry.

The stories were so remarkable, I couldn't choose just one winner. I have chosen 2 girls to receive a tutu and hairbow set and a third girl to receive an applique tutu shirt. It was hard enough narrowing the field to three! I wish I had time to make something for all the little girls. I feel very fortunate to be sharing in part of someone's joy this holiday season. I will be announcing the winners and sharing their stories. However, I want the winners to be surprised, so I will not be sharing until after the packages have been delivered. This will likely be after Christmas. Please be patient.

I urge all of you to look into your heart and do a random act of kindness of your own. As I said, I am humbled by the stories of these wonderful children. I hope my own daughters can be as poised, generous and brave as the girls I read about. Your act doesn't need to be grandiose or expensive. How about paying for the coffee of the person behind you in line at the coffee hut? What about filling the slots in a candy machine with quarters for a child to get a free gumball? How about helping a neighbor by shoveling their sidewalk? Have you thought about writing a thank you note to someone who is especially good at what they do? What about telling your child's teacher or daycare provider or school bus driver how much you appreciate them? How about making a tray of goodies for a friend? There are so many ways to show thankfulness and appreciation. Pay it forward. End the year with good karma.

Thanks again for sharing these wonderful stories with me. If you have be the recipient of a random act of kindness, please post a comment or email to carliacreations@gmail.com. Through the holiday season, I'd love to be able to share your stories as well.

Tuesday, December 6, 2011

Random Acts of Kindness

I admit it. I'm a sap for a good heartfelt story. I'm not a cry at a Hallmark commercial kind of gal, but tell me a true story about something someone did in memory of someone special or simply to be a better person and I'll tear up every time. Let me tell you more about why I'm posting this. First, my disclaimer statement: It is not my intention to be exclusive to Christians in this post. I recognize each person has his or her own beliefs and I respect and honor each of your rights to choose those beliefs. My family, however, is Christian and we celebrate Christmas, so for ease in writing this post, I will be speaking about Christmas.

I think most people would agree that holidays have become more commercialized, especially Christmas. If you are a parent whose children have access to any other children or media, you especially know what I'm talking about. It is very hard to separate the true meaning of Christmas from the advertising of it. I feel thankful we don't have cable TV and watch almost no TV in our house. It has helped prevent some of the "gimmes" with the kids.

This year has been different with the holiday for a couple of reasons. My oldest daughter is 3-1/2 and is old enough to understand beyond the tree, lights and Santa. My youngest is 1-1/2 and actually will appreciate a gift instead of the box and wrapping paper. BUT, for the first time since I was a kid, we've been talking about the meaning behind Christmas. My oldest goes to a Christian pre-school and learns Bible lessons each day. They've been learning the story of baby Jesus, singing Christmas songs and gearing up for the Christmas program (which this mama is so excited to see!). Talking about Christmas with her and having the focus be on celebrating Jesus' birthday (her words) has helped bring the focus back to the reason for the season for all of us. She gets as excited when she sees a nativity scene as she does when she sees a decorated tree.

We know that Christmas has become a time of sharing gifts. Most of us exchange gifts with the people we love. Many of us purchase and donate gifts to people we don't even know. For years my girlfriends and I adopted angels instead of exchanging gifts amongst ourselves. When I was a retail store manager, I asked my sales associates to buy a book so we could donate books to children in the community. Some people do random acts of kindness and ask that the recipient pay it forward. This weekend alone, I saw a quarter taped to a vending machine labeled "random act of kindness." In a bathroom in another store across town, there was a bag with some diapers and wipes and a card offering these to a mom who might need them. I read a story in this morning's paper about a white envelope on a tree. A woman began this tradition in the 80s where she did something nice for someone or made a donation to someone in need. She wrote down her gesture (and sealed in a white envelope) and gave it to her husband as his Christmas gift. This became the cornerstone of this family's Christmas tradition.

All of this generosity got me thinking: What can I do to make someone else's Christmas better? I may not be financially able to adopt an angel or donate money to charity, but I do have creative skills and supplies to make a special treat for a special child. I've seen others do something similar to this in the past, so the idea isn't mine. I'm just hoping to make a little one's holiday brighter. Here's the plan:

I will be taking nominations for one week (starting now). This nomination should include the name, address and story of a little girl who deserves a holiday princess treat. Next Tuesday (December 13), I will select from the entries one child who will receive a handmade princess tutu and matching hair bow (see picture for example). This will be mailed to the winning child as an anonymous gift (or from Santa if you would prefer). All nominations should be emailed to carliacreations@gmail.com. The winner will be announced on this blog and on my Carlia Creations facebook page (after the gift has been received). You may submit as many nominations as you want, however each nomination should be a separate email and only one nomination per child. This is open to any child living in the United States. If this is for a child who celebrates a holiday other than Christmas, please provide me with that information so I can wrap and send accordingly.

I looke forward to reading your submissions and sharing my little piece of holiday joy!

Monday, December 5, 2011

Gorilla Bread

I have the most amazing recipe to share today. First, I have to apologize for not posting for so long. I  have a couple of posts floating around in my head, but I just haven't taken the time to write them up for you. This time of year gets busy for everyone, so bear with me and I'll do my best to keep new ideas headed your way.

Way back on Halloween, Carlee asked to watch some PBS Kids during her quiet time. We don't have cable at our house and our bunny ears only get CBS and 4 channels of PBS. Fine by me. I would rather the kids do anything but watch TV. However, Carlee isn't napping anymore, so I do let her watch PBS for a little bit so she rests and this mama gets some time to rest too. Anyway, flipping from CBS to PBS, there was some daytime talk show that had Paula Deen showing how to make monkey bread. It was a super simple recipe and I filed it away to try out. Recently, I thought I'd try it, so I searched online for her recipe and found this tasty variation. You MUST try it. It is a simple treat for a breakfast/brunch or even a dessert. Here's what you need: (note-I made a double batch because my bundt pan is on the larger size. Adjust the ingredients accordingly.)


20 (2 cans of 10) refrigerator biscuits
1/2 cup sugar
1 T cinnamon
8oz cream cheese, cut into 20 cubes
1 stick butter
1 cup brown sugar
1 1/2 cup walnuts (optional I did not use these)


Grease and flour a bundt pan. Preheat oven to 400. Combine the sugar and cinnamon and set aside. Melt the butter in a small saucepan over medium heat. Add the brown sugar, stir until dissolved and bring to a boil. Remove from heat and set aside. Open the cans of biscuits. Flatten each biscuit slightly, place a cube of cream cheese in the middle of the biscuit and fold it over, pressing the edges to seal. Drop each biscuit pouch into the cinnamon and sugar to fully coat.


Put half of the nuts in the bottom of the pan. Place the sugared biscuits into the bundt pan. Once the bottom has been covered, pour half of the butter/brown sugar mixture over the biscuits. Repeat the steps using the rest of the ingredients. Bake in the oven for 25-30 minutes. Remove the gorilla bread from the pan while hot to prevent sticking.


I thought my husband was going to melt into the floor when he ate these. He had a look of pure bliss on his face. SURE to be a crowd pleaser!

Thursday, November 17, 2011

Turkey Time!

I can't believe Thanksgiving is a week from today! The fall always moves quickly and this year is no exception. I just got home from my no-kids, no-hubby vacation and I have to turn around and pack for our trip to Idaho next week. In the meantime, we are doing a few turkey crafts with the kiddos. Of course, there's the hand turkey which is perfect for the little ones at my house for daycare. Today's post is a little more complex. I wouldn't recommend for kids under 3. This idea was adapted from a turkey project my friend Jaime did with her kids. I hope you enjoy!

Here is what you need:
styrofoam balls (2 sizes)
paint
googly eyes
school glue
toothpicks
pipe cleaners
feathers


First, paint the styrofoam balls. You can be traditional and paint them brown or get creative and let the kids paint whatever color they want. Let them dry. This can take several hours depending on the type of paint used, so it is likely a 2-step project.


Using a toothpick, poke one end halfway into the large ball and then skewer the small ball on the opposite exposed end. This is your turkey body and head. I also used toothpicks to make legs for the turkey so it doesn't roll. You could also use pipe cleaners for this, but my daughter was in a hurry to get to the feather part.


Then glue on the googly eyes. This is another step that could take some time to dry. If your kids are anxious like mine, you can do the eyes last. Cut a small piece of pipe cleaner (2-3 inches) and curl one end up toward the top about 1/3 down. Using that 1/3, poke into the turkey head under the eyes for the wattle.


Here comes the fun part! Take various sizes and colors of feathers and poke into the turkey body. Sometimes the feathers weren't strong enough to pierce the styrofoam, so try to use ones that have a stiff spine. Personally, I like all sorts of colors on the turkeys because it's much more festive, but let the kids decide where to poke the feathers and what colors to use.


It's a pretty easy project, but some of the poking and the toothpicks requires older kids and/or adult supervision. Happy Thanksgiving!!

Friday, November 11, 2011

Lucky day! 11-11-11!

Today I'm headed on vacation. I've been planning and looking forward to this trip for months. It's a new adventure because I'm going without my family. I've never done that before. I've never left my youngest daughter more than overnight. But a weekend without diapers and wipes, bibs and sippy cups is just what I need. My hubby asked me last night what I was looking forward to most: my friend's wedding, seeing my college buddies, seeing my bff, or having time off from the responsibility of mom. I couldn't answer him. It's all so exciting and part of why it's going to be an amazing trip. Ironic i'm leaving on 11-11-11. Truly a day of luck. On a new adventure with old friends. Can't wait!

Thursday, November 10, 2011

Sweet Mustard Roast

We are a lucky family. My in-laws give us some fantastic canned veggies, frozen corn and beef every year. My dad gives us pork every year. We're thankful for the meat because it drastically reduces our grocery bill. My challenge is coming up with new ways to cook roasts (beef or pork). Let's face it, we've all had the beef roast cooked in the crock pot with some onion soup mix and a little broth. Can you say boring? It serves its purpose, but there's not much originality there. I think I've done a pretty good job creating meals using our roasts that aren't your same ol' recipe time and time again.

Today's recipe is a good one for either beef or pork. I made it with a pork roast and it was tasty. I had learned from a cooking class that mustard helps tenderize pork, so I thought "a tender roast?? Delish!" Here's what you need:

3-4 pound beef or pork roast
1/2 cup molasses
1/2 cup dijon mustard
1 tsp garlic powder
3 Tbsp vinegar (white or apple cider)


Combine all but the meat in the bottom of your slow cooker. Stir until well mixed. Toss in your meat and roll once to cover it with the sauce. Cook on low about 6 hours. That's it! You can always crank up the heat and cook for shorter time, but I'm a fan of low and slow with the roasts.

This was a simple recipe for a great new way to cook the pork. Leftovers were tasty. And our dog loved the bone that had slow cooked all day. :) Enjoy!!

Wednesday, November 9, 2011

Vacation Snacks

I've been a busy mama. On top of the regular everyday busy-ness, I've been trying to get ready for my trip. And when I say my trip, I mean MY trip, no husband, no children. I've never done anything like this before. The last time I went out of state by myself for fun, I wasn't even married yet. This is going to be an adventure for everyone. I traveled a couple times for work when my oldest was younger, but that's been 2 years. I've never left my youngest more than overnight, and that has been with family. I'm not worried about them, really. I think they'll miss their mom, but they are on the go so much, they likely won't notice. The hubby, on the other hand, is going to have his hands full. It's always different when dad takes over, but I think this time will be even more of a change. I know that since I have been home, I've taken care of lots of tasks at home. The hubby, to his credit, does his own laundry, cleans up the kitchen and dishes after dinner and helps with cleaning on the weekends. But the everyday tasks I do. I won't list everything I take care of, but you moms out there can relate.

I'm doing my best to set the hubby up for success this weekend. The groceries have been purchased (although I'm going to pick up a few things tomorrow night). I have a list on the fridge of everything he can make for which we have ingredients, including side dishes. I have several meals frozen so all he has to do is thaw, heat and serve. I have little breakfast burritos frozen for the kids for a quick breakfast on preschool day. (Let's see how he does getting 2 kids ready and out the door by 8:10am.) I'm even making some snacks. I have this great recipe for homemade chewy granola-type bars that are always a hit. The great thing is there are so many variations of the recipe. I'll give you the basics, but have fun and see what you can create! Here's what you need:

2 cups flaked cereal (I used the generic Honey Bunches of Oats, but any flakes will do)
2 cups oatmeal (I've tried both the quick oats and instant and they both work fine)
1/2 cup chocolate covered raisins or chocolate/butterscotch/peanut butter chips
1/2 cup peanuts or almonts (I used almonds because of the cereal, but be creative)
1/2 cup packed brown sugar
1/2 cup light corn syrup
1/2 cup plus 2 Tbsp creamy peanut butter
2 Tbsp vegetable oil
1 tsp vanilla extract (I used imitation, tasted just as good and helped me use it up!)


Lightly grease a baking pan. The original recipe calls for a 9" square pan, but I found that  makes the bars pretty thick. I use a 9"x13" pan and get 20 bars out of it. In a large bowl, mix cereal, oatmeal, raisins or chips and nuts. In a saucepan, stir brown sugar and corn syrup over low heat until it starts to boil. Remove from heat and stir in peanut butter, oil and vanilla until smooth. Pour this mixture over the cereal and stir until well combined. Dump into your prepared pan, press it out smoothly and evenly. Let cool. Cut into bars.


Like I said, I use a larger pan and cut into more bars. The portions are still a pretty good size. I even wrapped some in waxed paper and put into a zipper bag to take with me on the plane. The rest will stay here for the family. Delicious snack! Hope you enjoy!!

Monday, November 7, 2011

Keep yourself healthy!

Anyone who has kids knows how germy they can be. I can handle my kids' own germs, but when they come into contact with other kids who are germy or been exposed to germs, I want to protect them as much as possible. Luckily, my kids love to wash their hands. But I'm always looking for other healthy things I can incorporate into my family's every day life. For instance, we went sulfate free this summer. I worked with my doctor to pinpoint the cause of some skin issues and sulfates were what we isolated. I was amazed at how many products had SLS in them! Plus, I am a sucker for natural remedies and treatments.

Last year a friend of mine was talking about elderberry syrup and how she used it to help keep her family healthy. I didn't pay much attention at the time, but reading a blog article by my friend Cheryl reminded me about it. I did some research of my own and discovered elderberries have some pretty amazing benefits for us. From immunity boosting and diabetes to asthma and even weight loss, elderberries are more than just folk lore. I really wanted to give the elderberry syrup a shot with my family. Fortunately, I won a drawing and got a pound of elderberries as a prize. I made my first batch of elderberry syrup and was pleasantly surprised at how good it tastes! This is a supplement that I can get behind! My kids like it too.

For those of you who won't click on the link above to find out more about elderberries or check out my friend's blog, here are the basics. From herbwisdom.com:  Elderberry is used for its antioxidant activity, to lower cholesterol, to improve vision, to boost the immune system, to improve heart health and for coughs, colds, flu, bacterial and viral infections and tonsilitis. There have been studies showing elderberry treatment's effectiveness in treating the flu, specifically or colds in general. Simply take 1 tablespoon syrup per day as a preventative supplement. If you're starting to feel like the sickness is approaching, take a teaspoon every 2-3 hours for a faster recovery. Please note: elderberry syrup is made with honey, so it is not recommended for infants. Discuss with your physician or pediatrician when your child is old enough to have honey.

To make elderberry syrup, you need
2 oz dried elderberries
4 cups water
1-1/2 cups honey (raw, local, unprocessed if possible)
1-2 clean jars with tight fitting lids

Put the elderberries and water in a saucepan. Bring to a boil. Reduce heat and simmer until the liquid has reduced by half. This took about 40 minutes for me. Strain the liquid into a bowl and throw away the elderberries. Add the honey and stir until well dissolved. Let cool and pour into jars. You can store the syrup in the refrigerator for up to 1 year. You can also use the syrup on pancakes, yogurt, ice cream, etc.

I feel very lucky to have friends who are knowledgable in areas I'm not. Try something a friend has recommended to you. It doesn't have to be the elderberry syrup, but trust in your friends and use their suggestion to fuel some research of your own. I'm glad I did *wink*

Friday, November 4, 2011

Easy-Peasy Pasties

I've taken a couple days off from my blog because I've been a reading fool. I was really into my book and wanted to finish it before I leave on my vacation so I don't have to lug as many books in my carry-on. I had about 450 pages left on Sunday and finished it last night about 11. I HAD to start the next book in the series too. Chances are, I'll get into this one and have to bring an additional book anyway. I've had a couple friends suggest a Kindle for this reason. Might need to go on my wish list....or how about an iPad or Xoom? :)

Anyway, today's recipe is a simple recipe for pasties (that's pass-teez not pay-steez). In Montana, when you talk about pasties, many people think of the mining and Butte/Anaconda area. I guess, historically, they were very popular with the miners for a good, healthy meal and easily transported. I found out from my sister-in-law Julie that in the midwest, they're associated with the UP. I have no idea if they're mining based up there, but also a regional treat.

I had never made them before, but wanted to find a quick way to make them up. I got a bonus because I had some extras that froze really well and just needed to be reheated and were a great quick lunch. Here's my easy-peasy recipe:

1 box of pie refrigerated pie crusts
1-2 sirloin steaks
3-4 potatoes (your choose the kind, I used baby reds)
1 onion (again choose the kind you like best)
butter
salt
pepper
oregano

Start by cubing your meat. I chose sirloin because it is inexpensive and has a decent flavor, plus when you're cubing it, it can be a little marbled and doesn't really matter. It would also work great with elk steak for all you hunting families out there. For all the ingredients, cube them on the smaller size (remember you'll be stuffing a pouch). Peel the potatoes and cube. Chop the onion. Works best if each ingredient is in its own bowl.

Roll out the pie crusts. Using a bowl as a template, cut the crusts into 6" circles. You can gather the dough and re-knead, re-roll and cut out additional circles. Obviously, you can make your own dough for the pouches, but I wanted to simplify this step.


Take each circle and add your meat, potatoes, onion across the center of the circle. Season it with salt, pepper and oregano to taste. Then put a couple pats of butter on the top of the filling.


Fold over one side of the circle to enclose the ingredients. Dip your finger in water and lightly moisten the bottom edge of the dough on the pouch. Use a fork to seal the edges together. Then cut 2-3 slits on the top of the pouch to vent.


Bake them in a 350 degree oven for 25-30 minutes. As you can see from the picture, I chose to line my pan with parchment. It really helps them brown without burning and they lift easily off the sheet. It's pretty forgiving, so if I'm in a hurry, I'll bump it up to 400 degrees and decrease the time to 20 minutes. Let cool slighly before eating!


As I mentioned, these are a great prepare and freeze meal. Be sure to let them cool all the way before wrapping in plastic wrap and then sealing in a freezer zipper bag. You can pop them in the microwave and reheat for an easy lunch.

These pasties were so good. Using the pie crusts saved me some time and it was still delicious. Give them a shot. You'll like them I'm sure! Stay tuned. I'm trying a new recipe in the crock pot using a pork roast. The aroma is mouth-watering. I'll let you know!

Monday, October 31, 2011

Happy Halloween!

This is my favorite holiday. I have loved Halloween since I can remember. Because we live in Montana, it's usually cold. Growing up, we always had to have our costumes fit over our winter coats. I can remember the first time (5th grade) my mom let me trick or treat with my friends. SO COOL. I remember the Halloween fun night/school dances in junior high. I remember when I "graduated" from trick or treating to being the chaperone taking my younger brothers door to door. I remember my first Halloween at Cornell, carving pumpkins with my BFF Jaime in the Bowman-Carter kitchen. Every Halloween at Cornell had some highlights, but I won't bore you with the details. I had some pretty spectacular costumes as an adult, too. Going incognito with my BFF Amie the first year we were roommates. Several group costumes were the results of some creative nights with my girlfriends.

Now, I'm a mom and I get to live each Halloween through the eyes of my kids. The first Halloween as a parent was fun for the novelty of dressing up my infant daughter. But the following year was really amazing. That's when my little girl figured out what trick-or-treating really was. Seeing her light up and RUN from house to house is something I'll never forget. This year my youngest is old enough to figure out what trick-or-treating is. I really can't wait to see their grins.

We put out the Halloween decorations right before the 1st of October. We've made Halloween crafts all month long. We've chosen costumes. We carved pumpkins. We went to a Halloween costume party. We've even eaten a little Halloween candy early. It makes me a little sad to think about putting all this festive-ness away tomorrow. :(

In celebration of this AWESOME holiday, I'm going to share some photos from Halloweens past. Enjoy. I hope you have a fun night. I hope you get as much joy from your children as I do. And pray this darn rain stops. Trick or Treat!!
Carlee's 1st Halloween

Carlee's 2nd Halloween

Lia's 1st Halloween


Carlee's 3rd Halloween

 Carlee's 4th Halloween

Lia's 2nd Halloween

Thursday, October 27, 2011

Craft Stick Flowers

Here's another craft from my archives (meaning one I took pictures for months ago but haven't posted). I get all sorts of magazines and catalogs in the mail. I look through them to get inspiration for projects for the kids. If I see something I like, I try to manipulate it so I can make it using the supplies I have at home (instead of buying more). This was one of those projects. I have a big box of the large popsicle sticks. We use them onesie-twosie for masks, but this was the first project where they were the primary craft supply. Depending on the ages of your children, they might need very little help from an adult. Mine was about half and half. There is a lot of down time for drying on this craft, so it's a good one that keeps kids occupied throughout the day. Here's what you need:

8 popsicle sticks (more if you use the small kind)
paint
2 pipe cleaners
craft glue (or hot glue with adult)

First, paint 6 popsicle sticks the color(s) you want your flower to be and the other 2 the color(s) of the stem. Let dry.


Glue the flower sticks into a pinwheel. Glue the stem sticks into one long piece. Let dry.


Wind one pipe cleaner in a little spiral. Glue to center of pinwheel flower.


Glue the stem to the back of the flower. Twist the pipe cleaner around the stem to make leaves. See? Super simple and VERY cute!

Wednesday, October 26, 2011

To nap or not to nap, that is the question

We're going through some transition at our house right now. Both my daughters are working through a new nap schedule. It's not been fun. There are times of complete meltdown, mostly in the evenings. I would guess most parents have gone through this in the early parenting years. Any advice is certainly appreciated.

My oldest is 3. She goes to preschool 2 mornings a week. On those days, especially, she gets tired. Getting her to nap is usually a struggle but when she does sleep, she'll sleep for 2-3 hours. If I wake her up before her body thinks it's time to get up, she's a grouch. If she doesn't nap, she's a grouch in the evening. If she does nap, she's up until 10 at night. We can try to put her down earlier, but then she spends the time difference getting up, going potty, singing in her bed (and subsequently waking her sister). We may as well have waited until 10 anyway. Upon the advice of my friend Lauren, I stopped pushing the naps. She has to have quiet time, and I admit, I let her watch some PBS kids. She's been resting for about 2 hours and then getting back up to play. She hits a wall about dinner time and still has a grouchy time, but we have been able to get her to bed earlier (and enjoy some peace and quiet with just my husband and I). It's the evening time that is killing us right now. Everything is a struggle. It's the only time my hubby gets to spend with the kids, so he gets frustrated when they're crabby.

My youngest is 18 mos. She is moving from two to one nap a day. She's always been a good sleeper, but is just getting to the point where she doesn't need that second nap. She'd actually prefer to sleep from 10:30-12:30 or 1, but that really screws up the day because I have to either reheat her lunch, or make a second lunch and then she's up when others are sleeping/resting (and let's face it, mama needs some quiet time too). I usually push her through her morning slump and put her down after lunch. She'll still sleep for 2-3 hours, but she also gets crabby in the evenings. Her time is after dinner and there have been some meltdowns as of late. I put her down at 645 the other night (usual bedtime 8) and she slept until 730 the next morning.


We're working on this new napping. It's the nighttime attitudes that are the hardest and most frustrating. I'm hoping we'll get it worked out soon. Of course the time change is coming, so it could all be in vain. *sigh* I also want to move my youngest into the toddler bed, but I think there might be too much happening right now. Sometimes having all the change at once is an easier transition because we're not prolonging the transition part. Then I wonder if that's selfish reasoning. Where's that parenting answers handbook when you need it??